Week One:
Possible Genres: Horror, zombie/gore, dark, gothic, medieval, apocalyptic, burton-esque, trippy, macabre, surrealism, thriller, sci-fi.
Possible Locations: Graveyard, derelict mansion, gothic castle, eerie forest, abandoned children's playground, Hell, creepy cabin in the woods, church, crypt.
Possible Quotations:
- "We all go a little mad sometimes" - Psycho
- "They're coming to get you Barbara!" - Night of the Living Dead
- "Who's laughing now!?" - Evil Dead 2
- "I am The Devil and I am here to do the Devils work" - The Devils Rejects
- "The one thing about living in Santa Carla I never could stomach.. All the damn Vampires!" - The Lost Boys
- "A boys best friend is his mother" - Psycho
- "Listen to them, the children of the night, what sweet music they make" - Dracula
- "When there's no more room in Hell, the dead will walk the earth" - Dawn of the Dead
Images reference of Graveyards & Cemeteries
I have chosen to go ahead with the Graveyard location as I feel it fits into my chosen genre of Horror/Macabre extremely well. As well fitting in with my sadistic quote. I feel working with something I enjoy will have a more positive impact on my work. I am also not very confident working within Maya, so I thought a more simple location would work in my favour.
I have chosen to go ahead with the Graveyard location as I feel it fits into my chosen genre of Horror/Macabre extremely well. As well fitting in with my sadistic quote. I feel working with something I enjoy will have a more positive impact on my work. I am also not very confident working within Maya, so I thought a more simple location would work in my favour.

 |
| One of my own images, I like the tonal scale created. |


 |
| Tim Burton - The Nightmare before Christmas |


I want my graveyard to have a very Burton-esque gothic feel to it, with lots of dark shadows, mist and eerie looking, derelict gravestones as well as quite a contrasting tonal scale. Some deciduous winter trees also to add depth and a sinister vibe. I think these elements and the chosen location will work well.
Colour Palette
Below is a possible colour scheme for my layout. Notice how the colours are dark, gloomy and keeping to the gothic vibe.

Different angles of my location

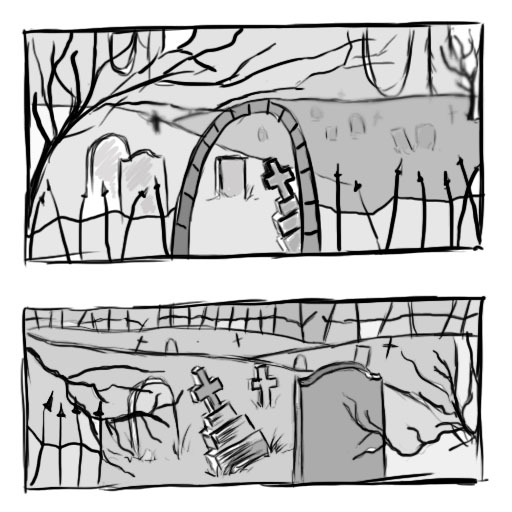
Rough storyboard plan (Drawings to follow)
- Scene begins with Norman having an evening stroll though a desolate graveyard at night.
- Hears footsteps behing him, stops in his tracks.
- Slowly begins to look behind him.
- Begins to quicken his pace.
- Hears the footsteps behind him quicken, so he begins to run.
- Sprinting through the graveyard, dodging headstone, Norman trips and falls to the ground.
- As he falls with a thud, Norman bangs his head on one of the gravestones.
- In pain and shock he blinks a few times and rubs his head.
- Hears a twig snap behind him, gasps and looks up.
- A dark figure carrying an axe slowly approaches him.
- Scared but in shock Norman slowly edges backwards in an attempt to scramble away.
- Figure emerges from the gloomy shadows.
- "I am The Devil and I am here to do The Devils work"
- The figure raises the axe, about to swing it over his head.
- Norman screams.
- Scene cuts.
Chosen video clip from lip sync
"I am The Devil and I am here to do The Devils work" - Otis B. Driftwood (Bill Moseley) The Devils Rejects.
Week Two:
First Storyboard Draft
(Enlarge by clicking on the image)
This is my first rough storyboard plan, showing a clear storyline with a beginning, middle and end. I feel the information is relatively clear and relevant to the brief. After receiving some feedback from my tutor, I will make any emends and improvements.


Maya work
Below are some cemetery gates I modelled in Maya. Below are a few reference images i liked the look of to base my gates upon.


Below are a few screen shots from my Maya work. I hope to play around some deformers with them also, to give them a zainy Tim Burton-eque look.


Week Three:
Final Storyboard
(Enlarge by clicking on the image)
After receiving some helpful feedback from my tutor, I have made a few positive improvements to my storyboard as well as cleaning it up a lot, making it more presentable. I have altered some of the camera angles, making Normans face visible - this is clearer when trying to convey Normans emotions.
I also decided to cut out the prolonged running scene and the tripping over. Instead I shortened it down to Norman just darting behind a gravestone, as I thought I would have more time to spend time perfecting the animation.


Week Four:
Animatic
Below is my animatic, which is based on my storyboard. I wanted to keep in looking quite contrasting in regards to tonal scale, to keep with the gothic, eerie aura. I feel this contrasting lighting will conjure a spooky atmosphere to it, as well as making it more dramatic, linking in with the horror genre I have chosen.
Maya Work
Below is a snapshot of the tree I have began to model in maya. I based in on a series of reference images. I wanted it to be without leaves to add to the errie gothicness of the graveyard. I feel the skeletal appearance gives it a more spooky look to it.


Week 5:
Sound Phonetics
In preparation for the lip sync, I have produced a sound phonetic sheet, to help animate the lip-sync correctly. Not only quit time consuming, I found this very difficult at times, as my clip is rather distorted as it it set in a very windy, open location. Hopefully it turns out well ready to animate to.

Lip Sync
Below is the lip-sync I animated to my chosen quote. I will try to get a better quality video uploaded shortly.
Maya

My maya modelling is pretty much completed now. However, I do still need to make a few tweaks here and there. Maybe stylise it a little more, by using the deformer tools. It is now ready for UV mapping and texturing.
UV Mapping & Texturing
The UV Mapping was a long and tedious process, it was very time consuming to complete. I mapped some of the gravestones with textures I researched and found online. For the remainder I used the textures found within maya. Once it all came together, I was pleased with the end result's, particularly the ones that had been UV mapped in photoshop.
Below is the first gravestone I UV mapped and textured, I duplicated this a few times to save me a lot of time within the scene. I was fond of the effect created, as it actually looks like it has been engraved, like a real gravestone. It fits the dark and gloomy gothic scene very well also.

Lighting
It was then time to put together the lighting within my scene. I wanted to get a rich, velvety nigh time aura. I wanted the scene to be visible but at the same time quite murky and mysterious. Almost as if you are unsure of what could be hiding in the shadows. The scene is lit by the moonlight, I thought a purple/midnight blue colour would look very effective reflecting off of the gravestones. Here is my first test render of the lighting. I think it looks very effective, portraying the right emotion I was looking for. However, I do think some tweaks will be needed, maybe to lighten it up slightly in some areas as it is still quite dark overall. Once the lighting is completed, I think it will really make the scene feel completed and give that finishing touch I am aspiring towards.

Below is another snapshot of my lighting. These are just tests, playing around with variations of colour, intensity and type of light. Although I like the almost tripping/psychedelic feel created created here, I don't think it would fit my dark gothic theme that I have been working towards, the lighting is not realistic and is way too harsh. I really want to get a stylised feel to it that sticks to my initial theme. I found lighting a lot harder than I first anticipated. As you have to keep rendering it over and over to see it in its's true and finalised form.

After a helpful tutorial with my tutor, we discussed the subject of introducing more than one light. Below is the final lighting result. We added an ambient light, a spotlight, as well as a directional light. We also played around with adding some fog to the scene. I think the final result is very effective. As well as giving it a realistic edge that it definitely lacked before.


Animating
I have now introduced the Norman rig into my scene. At first I found it rather difficult to get adapt to, with all the different keys and joints etc to get used to. However the more I practise and play around with the rig, the more I begin to understand it. Below are a couple of quick tests from playing around with the facial controls. This was a good exercise as it made me familiarise where everything was and what emotions Norman was capable of expressing. I was quite surprised at the extent he could do. I also did this with the rest of his body.


Animating:Walk Cycle
I am now up to animating the first scene of my film. It begins with Norman walking into the shot. It is quite a wide shot, to set the scene efficiently. After setting up the cameras I have began a simple walk cycle. Although I say simple, I found it extremely challenging. Surprisingly there is a lot to it. Here is a shot from my walk cycle - a simple contact position.

Final film.
Below is the final film. Although there are a number of mistakes, I am overall very proud of it. I feel I have progressed a great deal this term. This time last year I wouldn't ever dream I was capable of doing something like this. It may not be top of the class, but considering I could barely model the simplest of shapes a few months a go, this is a great achievement for me. I think this project has been a fantastic learning curve for me. I have made many mistakes, but also learnt from each and every one of them. It has definitely made me eager to progress further into the 3D side of animation. (Apologies, the video quality is not the best on this website.)